



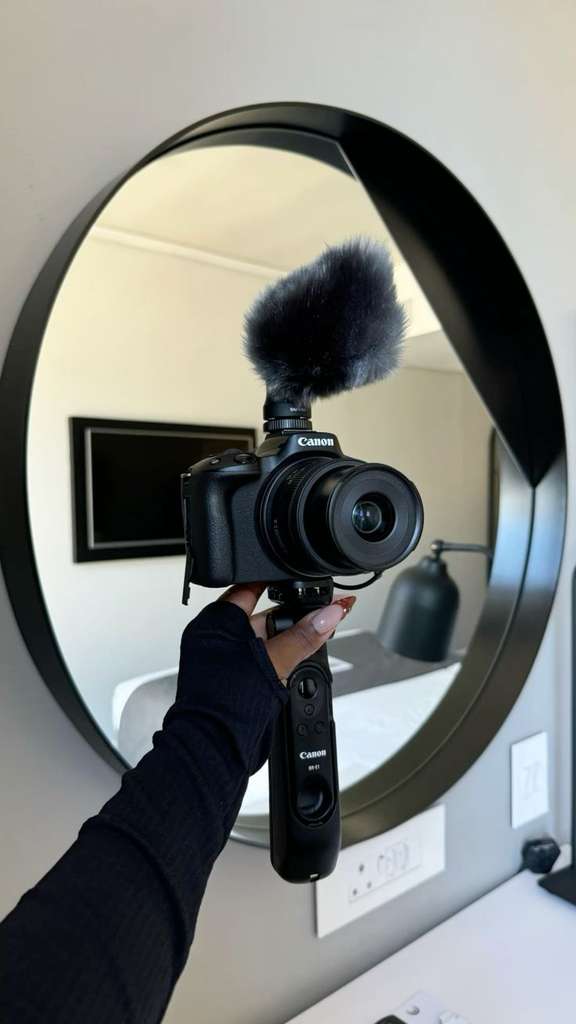
Let’s be real nobody tells you what you actually need before you start creating content. You open Amazon, search “content creator kit,” and get hit with 200 options, half of them overpriced and unnecessary.
No clarity on what’s essential versus what’s just marketing.That’s exactly why I put this together. If you have been searching for the best content creator tools on Amazon, wondering what equipment do content creators need, or trying to build a beginner content creator starter kit without draining your savings — you’re in the right place.
This isn’t a random list of trending products. It’s a beginner-friendly breakdown of the must-have tools for content creators, what’s genuinely worth buying under $50, and what to skip until you’re further along. No overwhelm, no unnecessary spending.
Just what you need, when you need it.Stick with me to the end the last section covers the one tool most beginners overspend on that you honestly don’t need yet.
What Equipment Do Content Creators Actually Need to Start?
Here’s the truth nobody says out loud: you don’t need half the stuff in those “content creator starter kit” videos. Most beginners overbuy in week one, then let half of it sit in a drawer by week three. So before you add anything to cart, let’s talk about what you actually need.If you’re wondering what equipment do content creators need, it really comes down to three things — and everything else is optional until you’re further along.
The 3 non-negotiables before you buy anything:
1. Good lighting. This matters more than your camera. A blurry video with great lighting looks better than a sharp video filmed in a dim room. Lighting is the single biggest thing separating “amateur” from “polished,” and it’s the cheapest fix on this list.
2. Stable footage. Shaky, handheld video is distracting no matter how good your content is. A simple tripod solves this instantly — you don’t need a gimbal or stabilizer yet.
3. Clear audio. People will forgive average video quality. They will not sit through content they can’t hear properly. Your phone’s built-in mic picks up room echo and background noise, which is why even a basic external mic changes everything.
That’s it. If you’re figuring out how to start content creation with no experience, resist the urge to buy a “complete kit” bundle right away. Start with these three categories, get comfortable using them, and build from there. The next three sections break down exactly what to get in each one — starting with lighting, since it makes the biggest visible difference for the smallest cost.
Best Lighting Tools for Beginner Content Creators
Lighting is where most beginners either overspend or underspend — there’s rarely a middle ground. So let’s fix that with what actually works.
Best ring light for content creators on Amazon
A basic 10-12 inch ring light with a phone holder and adjustable stand covers 90% of what beginners need. Look for one with adjustable color temperature (warm to cool) and multiple brightness settings — this lets you match your lighting to different times of day without needing separate lights. Avoid oversized ring lights early on; a smaller, desk-friendly size is easier to work with in most home setups and just as effective on camera.
Best lighting kit for filming videos at home
If you’re filming in a room with little natural light, a two-point softbox lighting kit is worth the upgrade once you’ve outgrown your ring light. It reduces harsh shadows on your face and background, which a single ring light can’t fully do on its own. For beginners specifically, look for kits with adjustable stands and diffusion covers — the diffusion is what softens the light so it doesn’t look artificial or overly bright on camera.
A quick tip that saves beginners money:position yourself facing a window during the day before buying anything. Natural light is free and often better than artificial lighting. Use that time to figure out what look you’re going for — warm, neutral, cool — so when you do buy a light, you’re buying the right one instead of guessing.Once your lighting is sorted, the next fix is stability — because even perfectly lit footage looks unprofessional if it’s shaky. Let’s get into tripods.
Best Tripods and Phone Mounts for Filming
Shaky footage is one of the fastest ways to make content look unprofessional, and it’s also one of the easiest fixes on this entire list. You don’t need anything expensive here — you need something stable and flexible enough to work in different spaces.
For beginners, a flexible tripod with bendable legs is more versatile than a traditional rigid one. It wraps around railings, chairs, or desk edges, which matters if you’re filming in a small apartment or shared space without a dedicated setup.
Look for one with:
– A universal phone mount that fits most phone sizes without extra attachments
– A remote shutter/clicker included — this lets you start and stop recording without running back and forth to your phone
– A height range that works both for tabletop shots and standing full-body shotsIf you’re filming primarily sit-down content — talking head videos, reviews, tutorials
— a compact desktop tripod is enough, and it’s usually the cheaper option.
Save the taller, floor-standing tripods for when you’re doing full-body or movement-based content like outfit videos or workouts.
One mistake to avoid: don’t buy a tripod without checking the phone mount’s grip width first.
A lot of beginners end up with a tripod that doesn’t securely hold newer, larger phones and a wobbly phone mount defeats the entire purpose of buying a tripod.
Once your footage is steady, the next thing viewers notice is sound and it’s the one area beginners skip most, even though it affects retention more than video quality does. Let’s talk audio.
Best Budget Microphones for Clear Audio
Here’s something most beginners don’t realize until it’s too late: viewers will tolerate mediocre lighting far more than they’ll tolerate bad audio. Muffled sound, echo, or background noise makes people click away faster than almost anything else which is exactly why this section matters more than it might seem.
You have two solid entry points here, depending on what you’re filming:
1. Lavalier (clip-on) mic — Best if you’re talking directly to camera, doing reviews, tutorials, or vlogging while moving around. It clips to your collar, stays out of frame, and picks up your voice clearly without grabbing every sound in the room. Look for one with a long enough cable or a wireless version with a reliable connection range this matters if you tend to walk around while filming.
2. Shotgun mic — Best if you’re filming from a slight distance, like a tripod setup a few feet away, or recording B-roll with voiceover added later. It mounts directly onto your phone or camera and picks up sound directionally, cutting down on room echo better than your phone’s built-in mic ever will.For most beginners just starting out, a clip-on lavalier mic is the better first buy ,it’s usually cheaper, simpler to use, and works well for the talking-to-camera content most new creators start with.
A quick test before you record anything: film a 10-second clip in the room you’ll actually be using, then play it back with headphones. If you hear an echo, add a soft surface nearby ,a rug, curtain, or even a blanket over a chair works surprisingly well to absorb sound until you’re ready to invest in proper acoustic panels.With lighting, stability, and audio covered, your footage is ready to actually look and sound professional. The next step is turning that raw footage into finished content which is where editing apps come in.
Best Editing Apps for Content Creators (Free and Paid)
You’ve got great lighting, steady footage, and clear audio but raw footage is still just raw footage. Editing is what turns it into content people actually want to watch, and thankfully, this is one area where beginners genuinely don’t need to spend money to start.
If you’re filming primarily on your phone, editing directly on your phone keeps your workflow simple and fast — no exporting footage back and forth between devices.
Two free apps cover almost everything a beginner needs:
– CapCut — Best for short-form content (TikTok, Reels, YouTube Shorts). It has built-in trending sounds, auto-captions, and simple text/transition tools that make short videos look polished without a learning curve.
– InShot — Best for slightly more controlled editing, like adding voiceovers, adjusting speed, or layering multiple clips. It’s more precise than CapCut for longer-form content but still beginner-friendly.
Both apps offer free versions with everything a beginner needs to start — you genuinely don’t need the paid tier until you’re editing regularly and want extra features like advanced color grading or removing watermarks.
Once you’re consistently posting and want more control, CapCut’s desktop version** and DaVinci Resolve (free) are worth exploring — DaVinci Resolve especially, since it’s professional-grade software that’s completely free, though it has a steeper learning curve than mobile apps. Save this step until you’re comfortable with basic editing; jumping into advanced software too early usually causes more frustration than progress.
A simple beginner editing rule: don’t over-edit. New creators often add too many transitions, effects, and text overlays trying to make content look “professional.” Clean cuts, clear captions, and good pacing outperform flashy effects almost every time — especially on platforms where watch time matters more than visual complexity.With your content filmed, sounding clear, and edited, the last piece is knowing exactly what to actually add to your Amazon cart — and what to skip.
Let’s break down the full budget-friendly shopping list next.
Amazon Products Every Content Creator Needs Under $50
Let’s put everything together into an actual shopping list — because at this point, you know what each category does.
Now it’s about knowing what’s genuinely worth buying versus what you can skip until later.
Here’s what covers the essentials without draining your budget:
– A compact ring light with phone holder — this single item solves most beginner lighting problems and doubles as your phone stand while filming.
– A flexible tripod with remote clicker — gives you stability and hands-free control, both for sit-down content and full-body shots.
– A clip-on lavalier mic — the single biggest audio upgrade you can make from your phone’s built-in mic, and usually the most affordable mic option available.
– A phone camera lens attachment (optional) — not essential, but a clip-on wide-angle lens is useful if you’re filming in small spaces and need more of the room in frame.
Buying just the first three items gives you a complete, functional setup. You genuinely don’t need more than that to start posting consistently.
A few smaller additions worth considering once your basics are covered:
– A phone cooling clip — useful if you film long sessions and notice your phone overheating or shutting down mid-record.
– A portable charger — especially handy if you’re filming outside your home and don’t want a dead battery cutting a session short.
– A memory card (if filming with a camera, not phone) — only relevant once you upgrade past phone filming.
Cheap content creation equipment for beginners: what to skip for now
Skip external cameras, gimbals, and full studio lighting kits until you’ve been creating consistently for at least a few weeks. These are common overspends beginners buy them expecting instant improvement, but consistency and content quality matter far more early on than gear upgrades. Your phone camera is genuinely good enough to start.
The goal here isn’t to buy everything at once it’s to get the essentials, start creating, and upgrade only when you actually feel the limitation of what you have.
Next, let’s talk about turning these individual tools into an actual home studio setup because how you arrange your space matters just as much as what’s in it.
Your Next Step as a Content Creator
Here’s what it comes down to: you don’t need a studio, a huge budget, or a cart full of gadgets to start creating good content. Lighting, stability, and clear audio are the three things that actually move the needle everything else is optional until you’ve outgrown the basics.
The creators who grow aren’t the ones with the most expensive setup. They’re the ones who started with what they had, stayed consistent, and upgraded only when they genuinely felt the limitation of their current gear. Overthinking your equipment is often just another form of procrastination dressed up as preparation.
So here’s your one clear action point: pick either the ring light or the tripod whichever solves your biggest current struggle add it to cart, and film your first video within the next 7 days.
Don’t wait until you have “everything.” Gear won’t make you consistent. Starting will.

